Making a Geodesic Dome in 2026: DIY Guide, Cost, Kits & Modern Trends
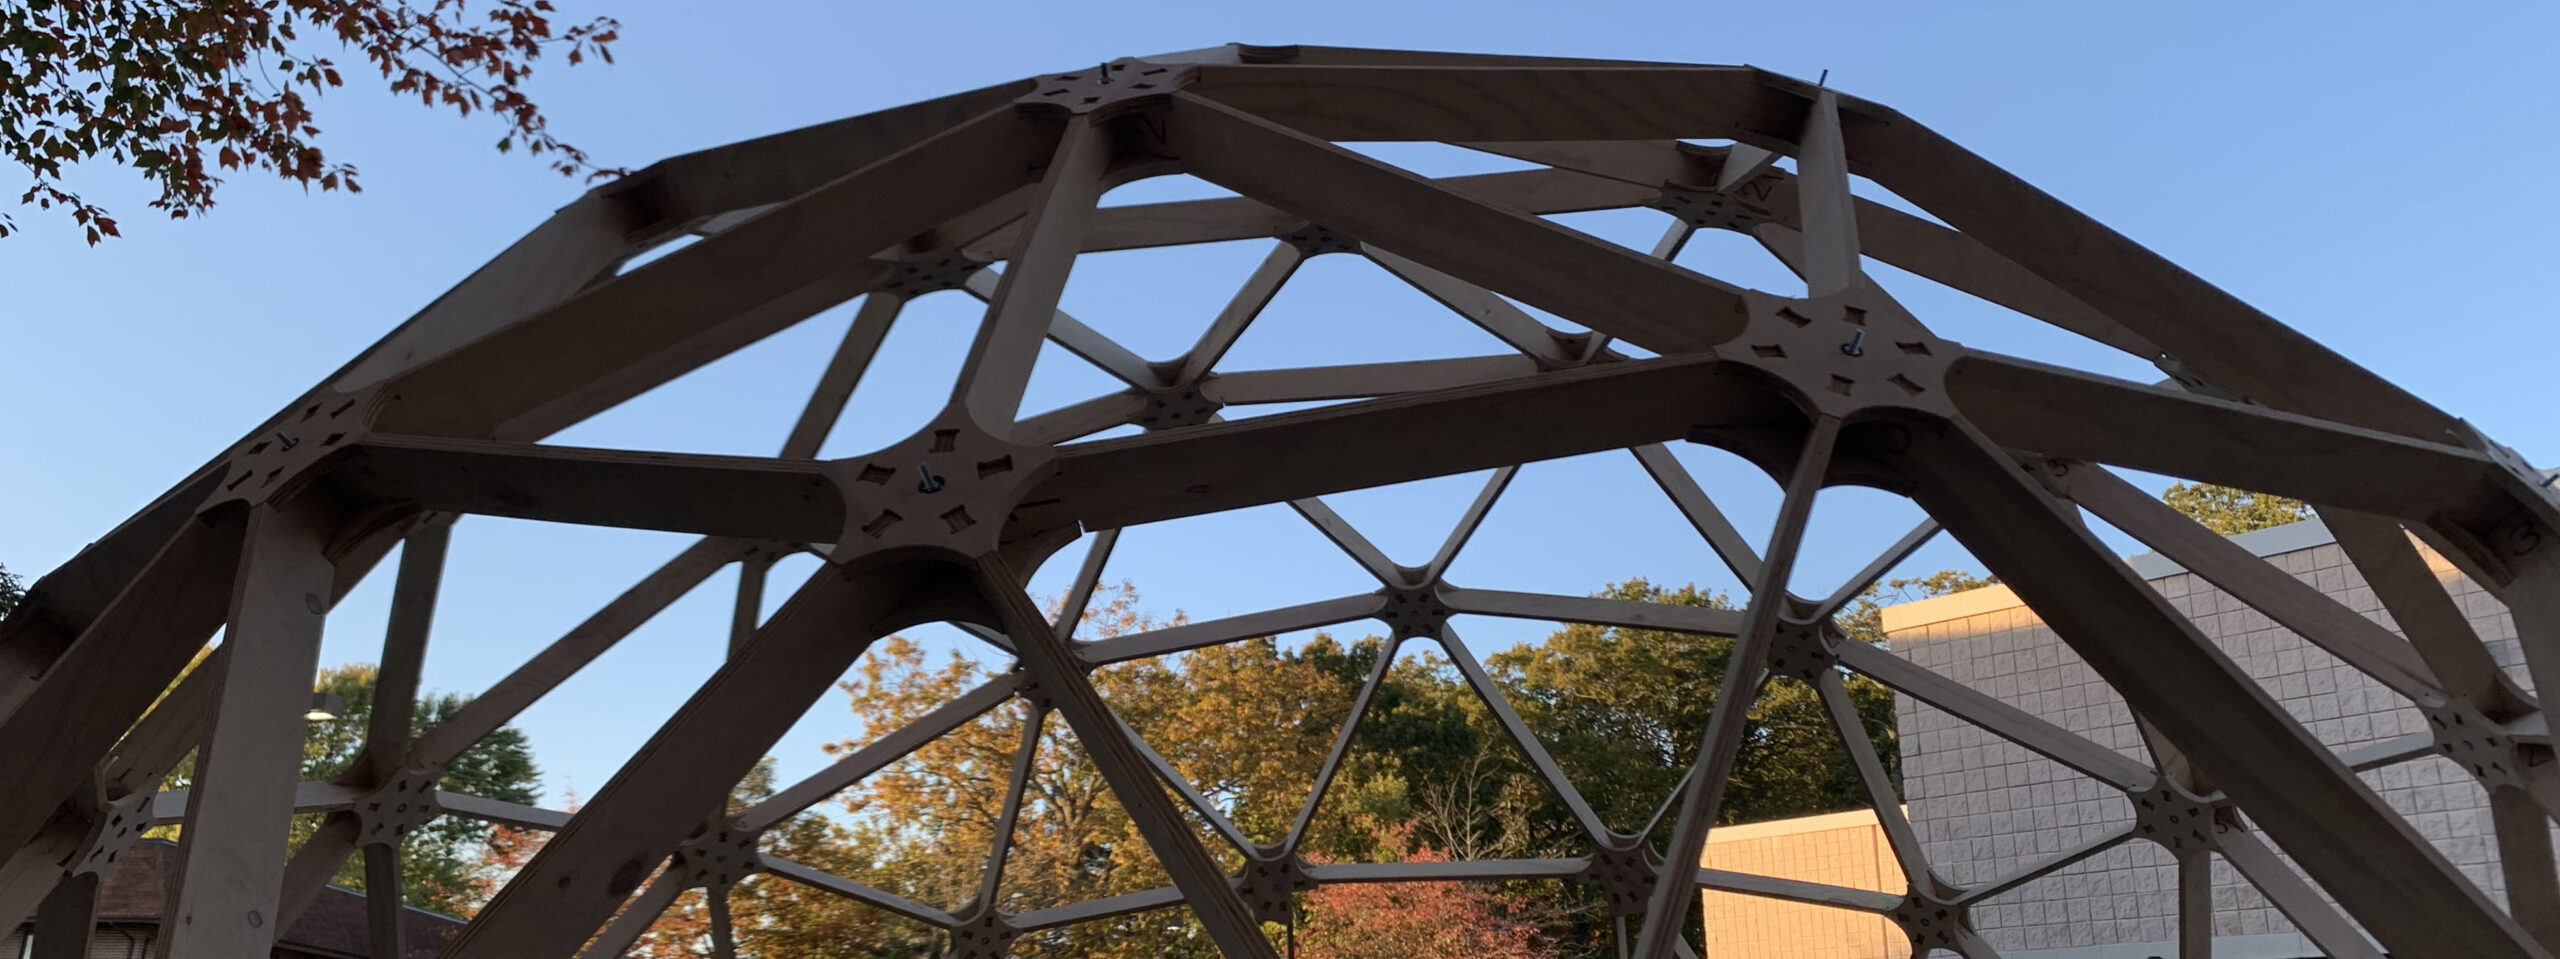
Table of Contents
Why Choose a Geodesic Dome Structure?
Geodesic domes are not only visually striking, but they also deliver performance advantages that make them a smart choice for glamping retreats, recreational spaces, greenhouses, and event areas in 2025.
Unmatched Structural Integrity and Efficiency
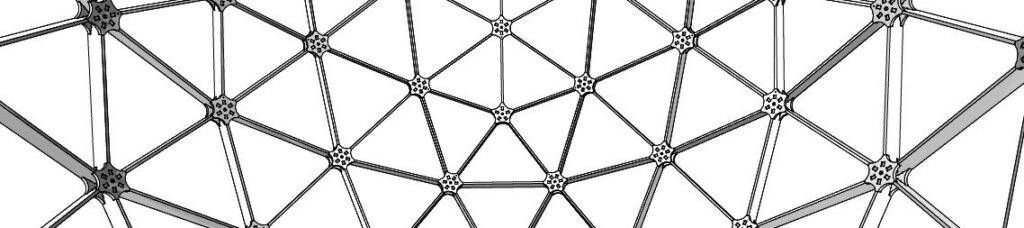
The triangular network of struts distributes stress evenly throughout the structure, making it remarkably strong for its weight. Geodesic domes can withstand heavy snow, strong winds, and other challenging outdoor conditions that could compromise conventional structures.
Superior Energy Performance and Sustainability
The spherical shape encloses maximum volume with minimal surface area, reducing heat loss and gain. This natural efficiency helps maintain comfort in all seasons while minimizing energy use for heating or cooling inside glamping tents or recreational spaces.
Design Flexibility and Modern Aesthetic
From a small glamping pod to a multi-functional recreational shelter, geodesic domes scale beautifully. The open interior plan, free of load-bearing walls, creates a sense of spaciousness while connecting occupants to the surrounding environment.
Planning and Designing Your 2026 Geodesic Dome
A bit of planning upfront makes building your dome easier, more enjoyable, and stress-free. Take some time to consider the type of foundation you’ll need, whether you want to assemble it yourself, or let us handle the complete installation for you.
Choosing the Right Size and Frequency (2V vs. 3V)
“Frequency” refers to how many triangles subdivide the base sphere. A 2V dome has larger triangles, requiring bigger beams to achieve a comfortable interior height—making it heavier, harder to handle, and more expensive to deliver. A 3V dome, by contrast, uses smaller triangles for a more spherical shape, greater strength, and a refined appearance, while keeping beam sizes manageable. For clients seeking the best balance of durability, aesthetics, and practical assembly, a 3V dome is the recommended choice.”
Sourcing or Creating Your Dome Plans
Our Geodesic Dome assembly kit includes comprehensive drawings and step-by-step instructions, giving you everything you need for a smooth and confident build. If required, these drawings can be submitted to your local building department (AHJ) to ensure compliance with regulations. This gives you a clear roadmap for your dome and peace of mind before construction begins.
Essential Software and Calculators for 2026
Using Rhino and Grasshopper as our parametric design engine, we craft geodesic structures with precision and flexibility, allowing for easy integration of windows, doors, and custom interior features tailored to your vision.
Understanding Local Building Codes and Permits
Before purchasing materials, contact your local building department. Our standard dome structure is just under 200 sq ft, which in many areas falls below the permit threshold. However, we always recommend confirming local regulations to ensure your project complies with area and permit requirements.
Materials and Components: Why Choose Our Kit
Our geodesic dome kit is the easiest and most reliable way to build a high-quality structure. While assembling a dome entirely on your own without specialized equipment and precise tools is extremely challenging, our kit provides pre-cut components, detailed instructions, and engineered connectors—ensuring durability, accuracy, and a stress-free build from start to finish.
Strut and Joint Materials: Why Our Kit Is the Right Choice
Each of our geodesic domes is made from durable waterproof plywood—a modern, sustainable material that combines structural strength with a refined natural aesthetic. Every beam and panel is CNC-cut for absolute precision, ensuring perfect geometry, tight joints, and fast, error-free assembly. This level of accuracy and fit is impossible to achieve using basic tools or manual cutting methods.
Unlike DIY constructions that rely on improvised materials or uneven joints, our system is fully integrated—the structural framework is formed from precision-cut plywood components connected with metal bolts and nuts. The exterior can be finished with a variety of façade materials, including natural wood panels, transparent polycarbonate, vinyl film, or durable weather-resistant cladding. This approach ensures structural stability, light weight, and excellent thermal performance, while allowing the dome to adapt to different climates and design preferences.
Connector Type: Precision Fit with Metal Hardware
Our geodesic domes use an integrated connection system—each joint is pre-cut with CNC precision and assembled using metal bolts and nuts for lasting strength and accuracy. This method eliminates the need for bulky hub kits or complex DIY connectors, ensuring every angle aligns perfectly right out of the box.
Because all structural elements are pre-engineered to fit together precisely, assembly is fast, reliable, and requires no special fabrication skills. The result is a stable, lightweight, and durable frame that maintains perfect geometry over time.
Dome Covering Options: Plywood, Vinyl, or Polycarbonate
- Plywood Panels: The main structural and exterior material of our domes. Durable, easy to finish, and naturally insulating. Can be left exposed, painted, or sealed for weather protection.
- Vinyl Membrane: An optional outer layer that adds waterproofing and smooth appearance. It’s lightweight, easy to maintain, and ideal for creating a clean, modern finish.
- Polycarbonate Inserts: Used for skylights and window openings, providing natural light while maintaining the dome’s weather resistance and structural integrity.
Insulation and Waterproofing for Maximum Efficiency
Our dome panels are precision-designed with built-in waterproofing, ensuring that every joint and seam resists moisture without the need for additional insulation materials. The facade system balances weather protection, natural light, and ventilation, creating a durable and comfortable space year-round.
The Assembly Process: Step-by-Step Overview
Building a geodesic dome is primarily an assembly process, not traditional construction. Following a clear, methodical approach ensures safety, efficiency, and a perfect final result. Having a helper is recommended.
Step 1: Preparing the Foundation
The foundation must be level to ensure proper alignment of the dome panels. Common options include a concrete pier foundation, which works well on uneven ground, or a reinforced concrete slab-on-grade, which provides a solid and finished base.
Step 2: Laying Out the Base
Start by arranging the first layer of panels or framework on the foundation according to your plan. Label each piece clearly to simplify the process. The precision-cut components fit together accurately, making assembly straightforward and reducing the risk of mistakes.
Step 3: Building the Dome Frame
Gradually connect additional panels or struts, working symmetrically around the structure. As more sections are added, the dome begins to support itself. Tighten all bolts and fasteners only after the frame is fully assembled and squared.
Step 4: Attaching Exterior Panels
Install the pre-designed facade panels, starting from the bottom and working upward. Each panel is engineered for durability, weather resistance, and proper alignment. Transparent sections can be included for natural light, while nontransparent panels can protect from direct sun.
Step 5: Final Assembly and Inspection
Secure all connections with metal bolts and nuts, checking each joint for stability. The dome is now complete, fully insulated through panel design, and ready for use. No additional construction materials are required, making the process efficient, safe, and predictable.
Step 6: Assembling the Struts and Hubs
All struts and hubs come pre-cut and ready for assembly. To ensure a perfect fit and stable structure, carefully follow the detailed instructions included in your dome kit. Each piece is labeled for easy identification, making the assembly straightforward and error-free.
Step 7: Raising the Dome Frame
Gradually connect the pre-cut struts and hubs according to the assembly instructions, working symmetrically around the structure. As more triangles are added, the dome becomes self-supporting. Only fully tighten all bolts and fasteners once the entire frame is assembled and squared to ensure stability and accuracy.
Step 8: Installing the Skin and Cladding
All facade panels are pre-fabricated and ready for installation. Follow the included instructions carefully to ensure proper alignment, secure connections, and optimal waterproofing. Each panel is designed to fit precisely, making the process efficient while maintaining durability and weather resistance.
Cost Analysis and Project Management
Be realistic about your budget and how involved you want to be in assembling your dome.
Breaking Down the Budget
A standard pre-fabricated dome kit for a small to medium-sized structure typically costs between $5,500 and $15,000, depending on chosen facade panels and optional interior finishes. The kit provides precision, durability, and easy assembly, whether you choose to build it yourself or have our team assemble it for you. Always allow a small extra budget for optional upgrades or unforeseen adjustments.
Timeline Expectations from Start to Finish
Assembling the frame of a standard-sized dome usually takes about a day. Installing the pre-fabricated facade panels and completing interior details takes additional time, but the process is straightforward and fully guided by the included instructions. For most people, the entire project can be completed over a couple of days.
Frequently Asked Questions (FAQ)
How much does it cost to build a geodesic dome?
A standard pre-fabricated dome kit for a small to medium-sized structure typically costs between $5,000 and $15,000, depending on facade options and any additional interior features.. This includes precision-cut components and assembly instructions for easy installation.
What is the best material for geodesic dome struts?
All of our domes use durable, waterproof plywood for the structural beams. This material provides strength, light weight, and excellent thermal performance, while pre-cut components ensure accuracy and fast assembly.
Are geodesic domes safe in high winds and heavy snow?
Yes, the geodesic design is extremely stable. The triangular framework distributes stress efficiently, making it highly resilient to wind, snow, and other environmental loads.
Do I need a special foundation for a dome?
A standard level foundation is sufficient. This can include a concrete pier system, reinforced slab, flat patio, deck, or even level grass. The dome can also be secured to the ground using anchors to ensure stability. The key is to have a level base so the structure assembles correctly and remains safe.
What are the biggest challenges of building a geodesic dome?
The main challenges are carefully following the instructions and correctly connecting all pre-cut struts and hubs. Our kit is designed to make this process straightforward and reduce the risk of errors.
Related Posts
FANCY STRUCTURE at the NJ Home & Garden Show 2026 in Edison
Geometry of Strength: Triangulated Structures